Method To Dual Boot Chrome OS and Windows 10
Dual Boot Chrome OS and Windows 10: There are many users who want to run both Chrome and Windows 10 at the same time. That’s why today we bring you an article that tells you how to boot Chrome OS and Windows 10. It also tells you quickly and consistently about the performance of Chrome OS and Windows 10. It also supports Play Store and Linux apps. It’s basically a combination of Chrome OS and Windows 10 for the user. Without further ado, let’s learn how to install Chrome OS and Windows 10 on the same machine.
Before proceeding, this article is a bit technical so it is important that you know about the operating system. In addition, it will not touch any of the files in your window, but you must still back up all your important files. No one knows when things will change. I recommend that you do everything steps by step and for your convenience, we have separate sections.
1. Requisite
2. Downloads
3. File Management
4. Division
5. Linux Mint Cinnamon
6. Chrome OS Install
7. Chrome OS and Windows 10 Boot
8. Troubleshoot
Requisite:- Support UEFI in BIOS
CPU and GPU Intel-Based (AMD CPU are not tested, so working chance are low )
16GB of storage space USB drive

Downloads:-First, you need to download the Linux Mint Cinnamon image. You can do this on 64-bit or 32-bit depending on the architecture of your PC.
2. Then, download Rufus for flash Linux Mint Cinnamon on the USB drive.

3. Next, download Chrome OS for image recovery. Then go to the website and search for “rammus”. Now click on the recent recovery image. Rammus is the device that is recommended for 4th generation Intel CPU and newer. But if you have a 3rd-gen Intel CPU or older, you can download Samus. If you have an AMD CPU then use grunt.

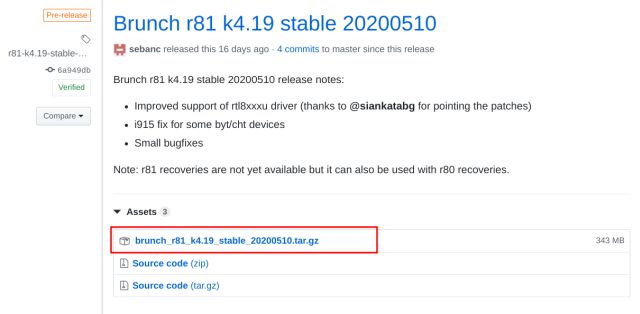
4. Download Brunch which is an important file. This is a framework created by a developer and is named sebanc. It can be easily installed on any Windows PC. This creates a generic Chrome OS image that helps with the recovery process. If you want to download any file then Click on “Assets” Then you download the “tar.gz” file
5. Finally, download “multi_install.sh” which installs Chrome OS. You can use Ctrl + S to download it and then save it. All of these steps complete the download.
3. File Management
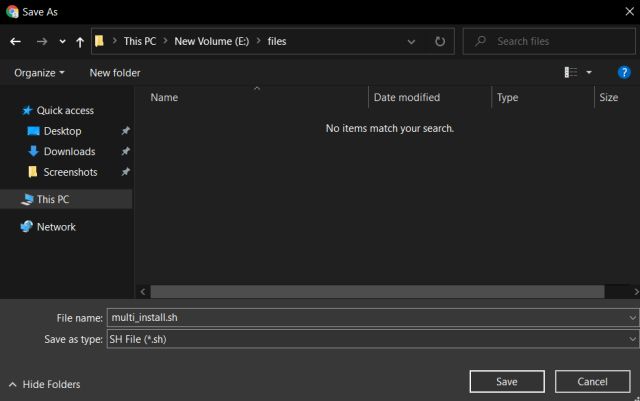
1. The first step is to create a folder on the drive called “Chrome OS”. Then place the file named “multi_install.sh” in this folder.
2. 2. Right-click on the Brunch file to extract all the files.
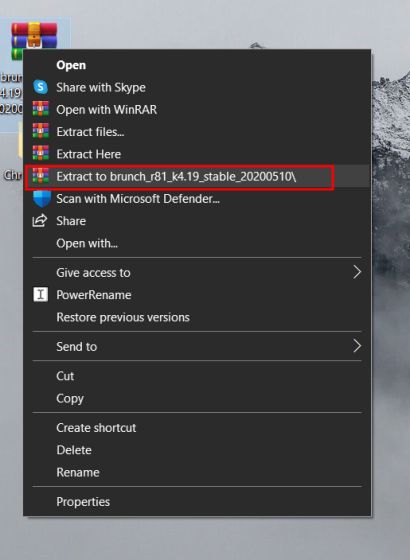
3. Keep all these files in the same (“Chrome OS”) folder.
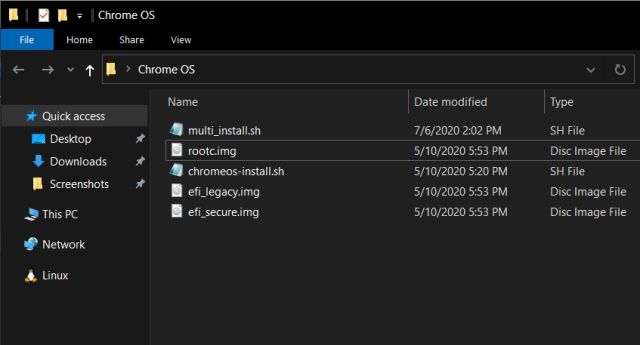
4. This is how you can create a folder by extracting the image. Then rename it to rammus_recovery.bin. You can customize the name of any other picture.
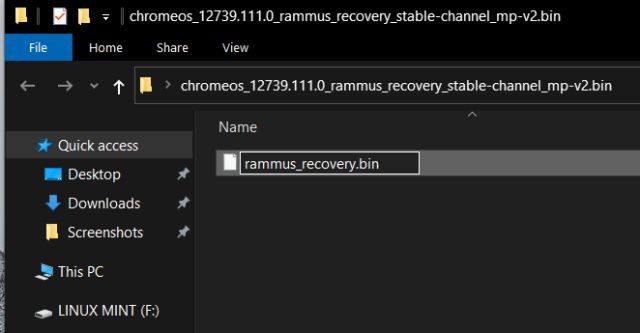
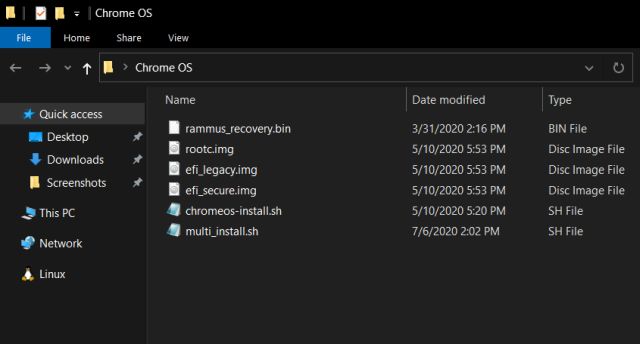
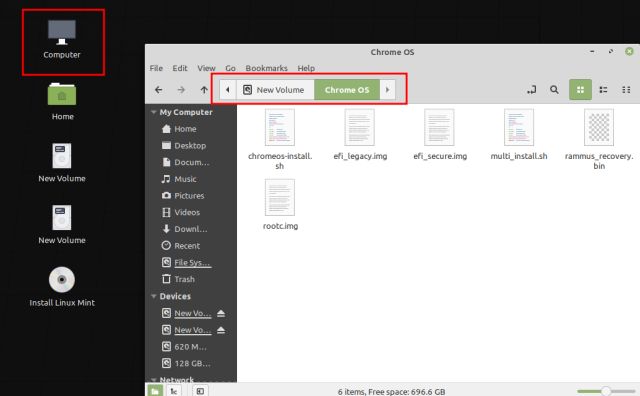
5. Finally, you move “rammus_recovery.bin” to “Chrome OS”. This way you will eventually have 6 files in the “Chrome OS” folder. Make sure you know where the “Chrome OS” folder is located.
4.Division
When we create a partition for a single user, many problems can arise. So keep fixing any errors. If you use this method, you can split it into two parts, one for 100 GB and 60 GB. You can increase or decrease the size as per your requirement. But if you have a lot of space, you can follow it.
Note that we will use 100GB in the distribution of Chrome OS and 60GB for the image file. Once installed you can use 60GB anywhere on Windows 10.
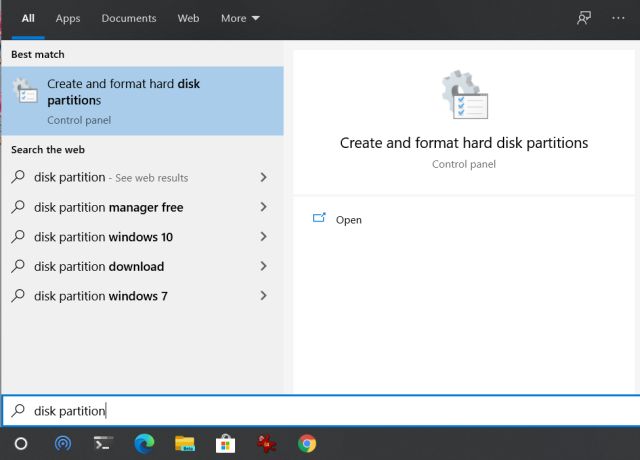
1. By pressing the window key button you find “disk partition” and click on the first result.
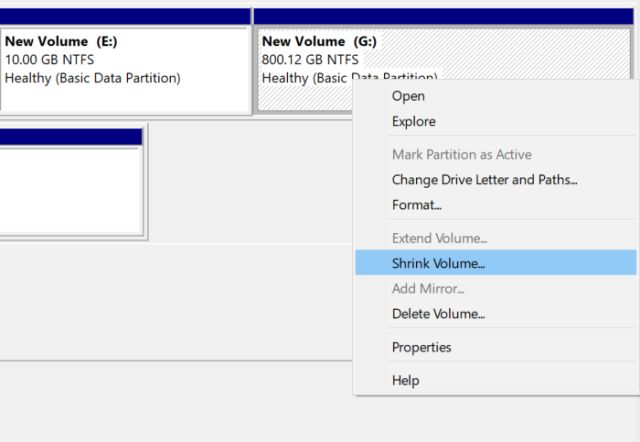
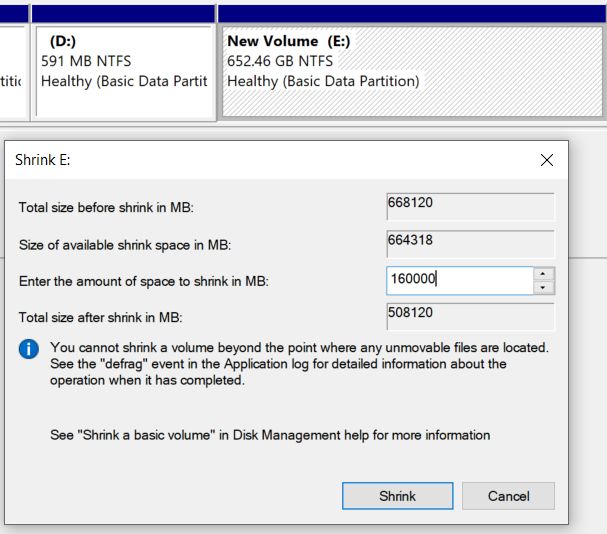
2. Here you have to right-click on the last drive and select “Shrink Volume”.
3. Enter 160GB of data if you have a lot of space and click “Shrink”.
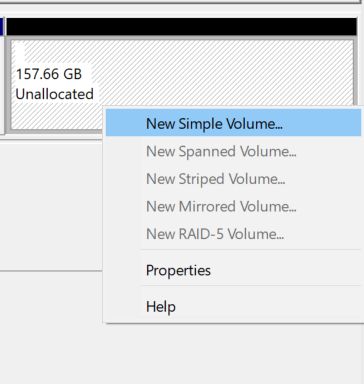
4. Then, right-click on the specified section and create a “New Simple Segment”
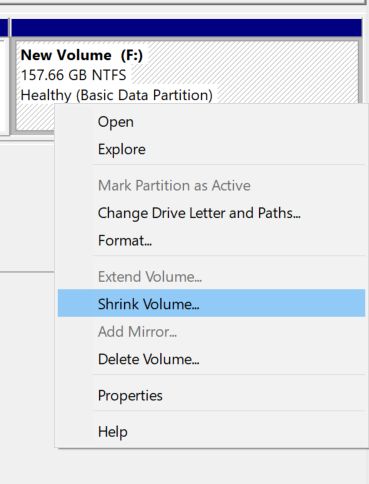
5. After doing this, right-click on 160GB and select “Shrink”. Then insert 60GB and create another partition. This will become an easy New Simple Volume.
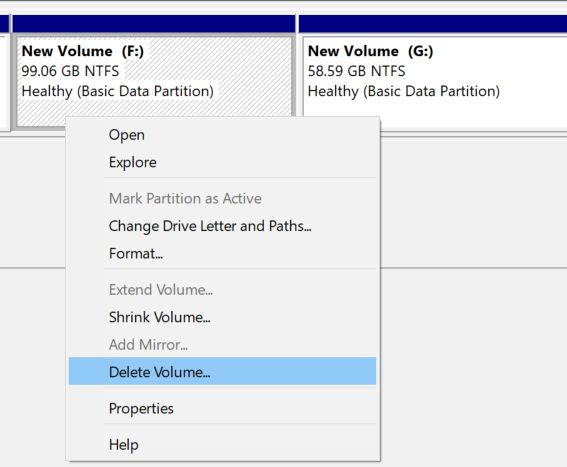
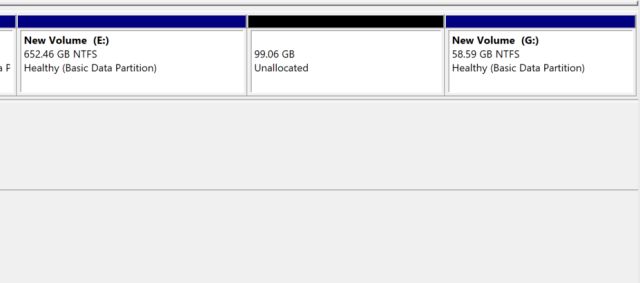
6. Then click on 100GB partition and select “Delete Volume”. This will be an “Unallocated” partition. You can now successfully install Chrome OS on a window partition. Eventually, you will get a picture like this.
5. Linux Mint Cinnamon
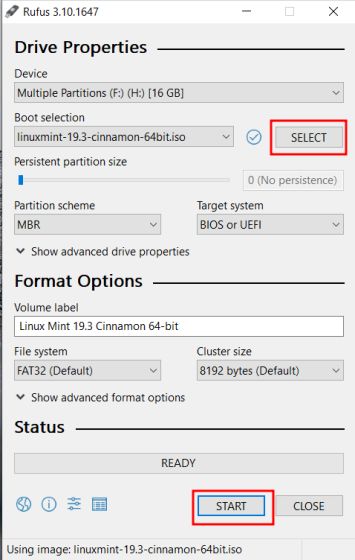
1. Connect your USB to open Rufus. Then select the Linux Mint Cinnamon ISO image and click on Start. A prompt will appear in front of you saying yes then ok and move on.
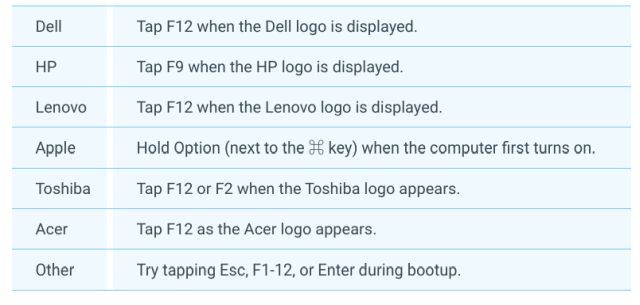
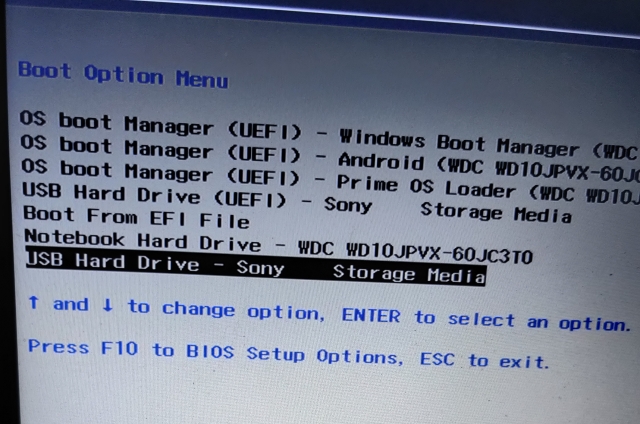
2. Now insert the USB flash drive into your PC on which you want to install Chrome OS. If it is the same PC then make it continuous. Then restart your computer and press the boot key. Boot it into the BIOS.
3. After setting foot on the BIOS, shift to the “Boot” tab, and select “UEFI” from the list.
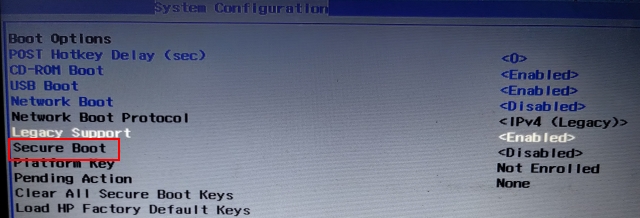
4. Then move the “Security” tab and disable “Secure Boot”. Also, keep in mind that the interface of each machine may be different from the other machine. Then you look at “UEFI” and make changes accordingly.

5. Finally, select “Exit Save Changes”. At the same time start pressing the boot key. Select “USB drive” when they ask you.

6. Chrome OS Install
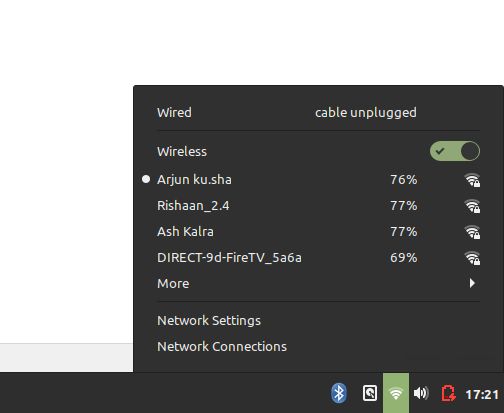
1. You have now booted the Linux Mint. Connect your PC to the Internet whatever you have. Chrome OS requires a network for libraries and dependencies.
2. Now place the “Computer” where you have stored the “Chrome OS folder”.
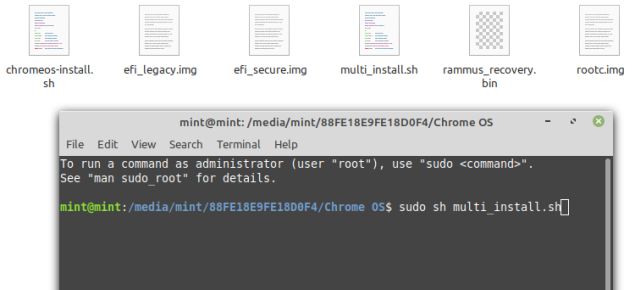
3. Right-click anywhere on the window and open Terminal, type sudo sh multi_install.sh and press enter key.
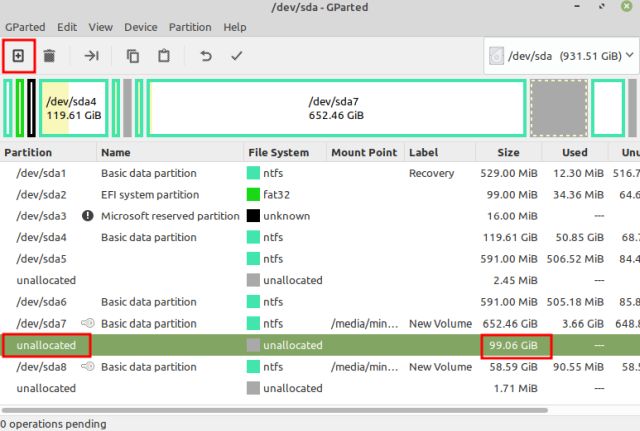
4. It will download the essentials and then the GParted window will open. Scroll down and select “unallocated” and hit the Plus button at the top of the menu bar.
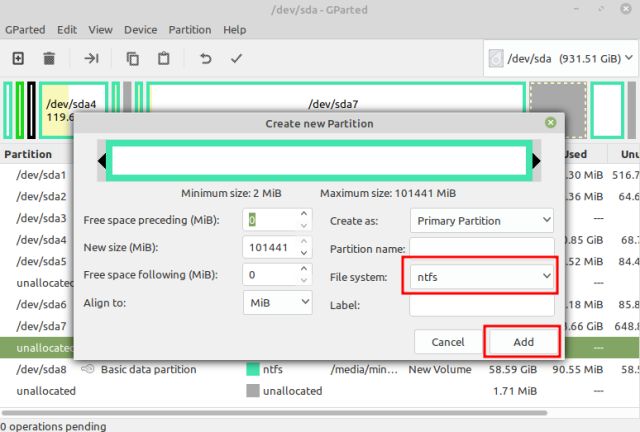
5. Select “ntfs” as the file system and press on “Add”.
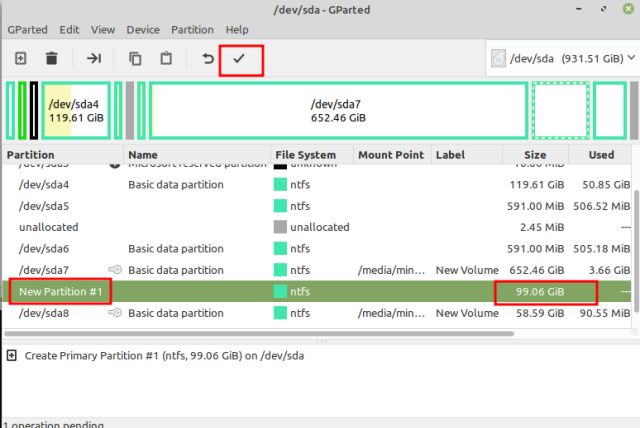
6. Click the “Done” button at the menu-bar.
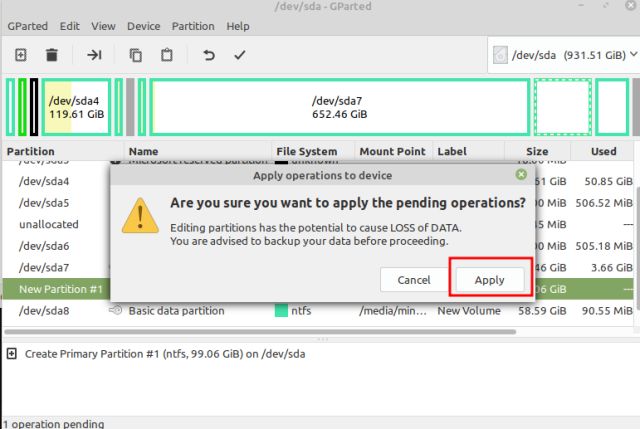
7. Next, press the “Apply” button.
8. This partition will start with “sda” number and close the GParted window.
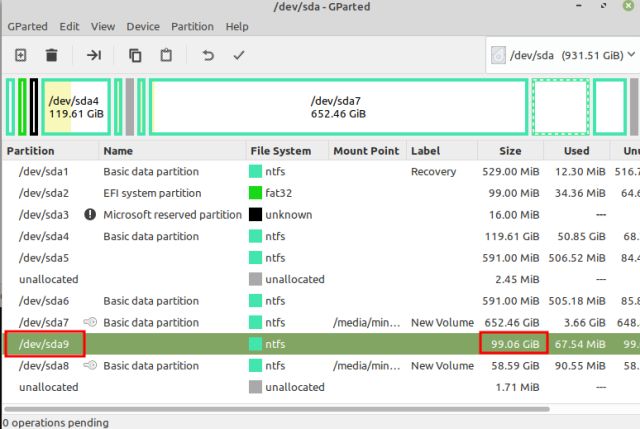
9. On the Terminal window, get into the partition number that marks above and hit it.
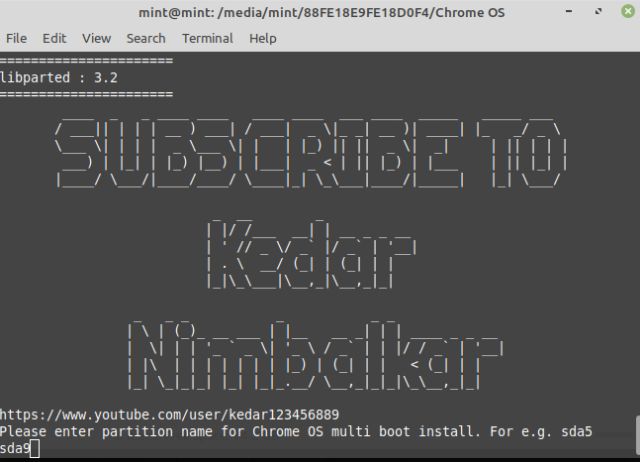
10. It will ask for your confirmation and show you the full details. If all goes well, write yes and press Enter.
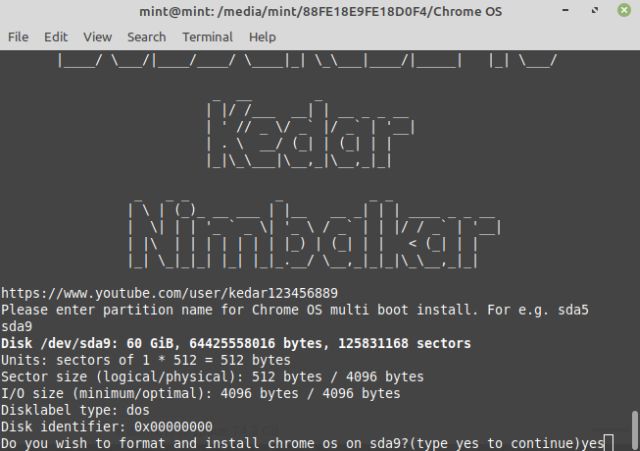
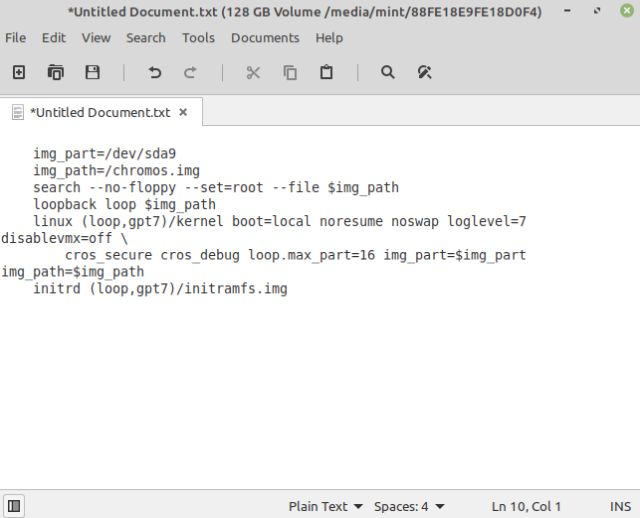
11. I will now install Chrome OS on the Linux Mint window partition. You will then find the “menuentry” section and copy it.
12. Go “Computer” desktop and move to C drive or other Windows partition. Click right and select New Document -> Empty document add .txt at the last and save.

13. Open the text file and paste the commands that you copied and save the text file.
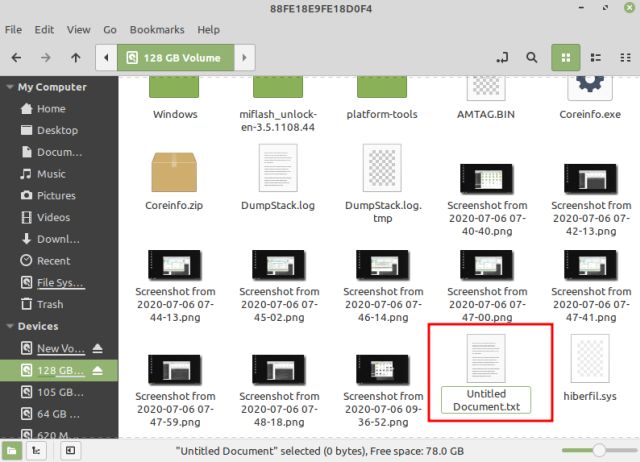
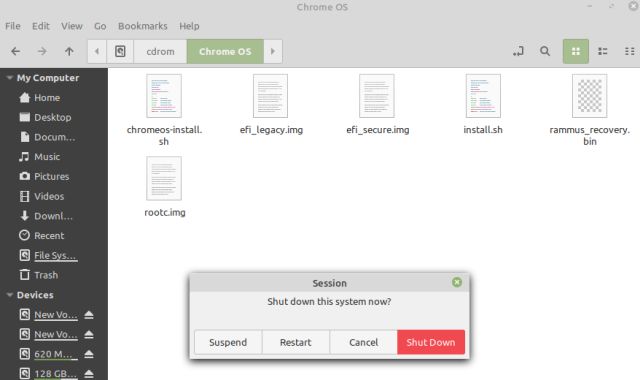
14. You complete the installation. Click on the start menu of Linux Mint and restart the machine. After that, remove the USB drive and you will boot directly into Windows 10 after one step.
7. Chrome OS and Windows 10 Boot
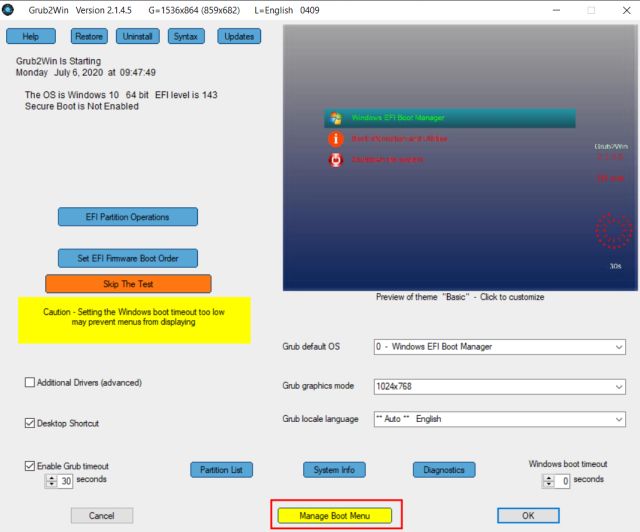
1. You will need a bootable OS when you run Chrome OS on a Windows partition. For this, we will use Grub2Win application which you can download for free. It’s a little slow so run it peacefully.
2. Keep all settings default and click on “Manage Boot Menu”
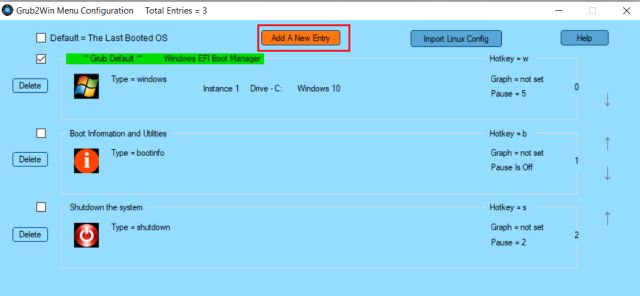
3. Now, click “Add a New Entry“.
4. From the Down place menu, select “submenu” and write “Chrome OS” under the Title field. Then click on “Edit Custom Code“.
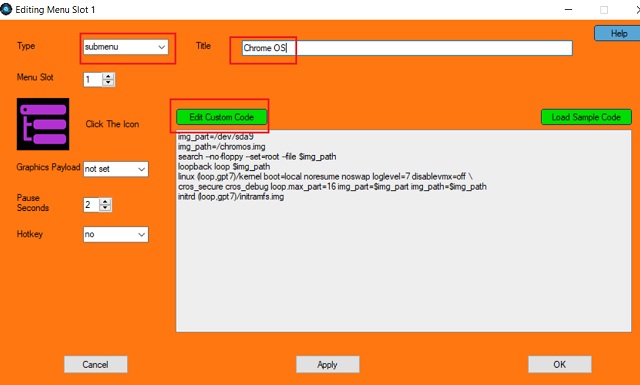
5. Paste command here (copy from the Terminal) and save as text file. It should be with “img_part” and ensure there is no “}” at the last. After That “Apply” and “OK”.

6. Now, With Help Of “arrow” icon you can also move Chrome OS and in the end, click on “Apply”.
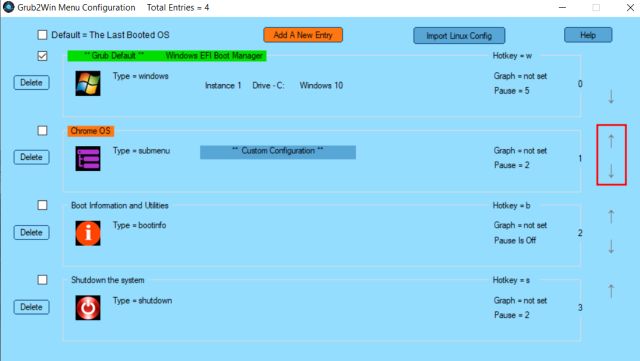
7. 7. When You Restart Your PC, you get both Chrome OS and Windows 10 in a Grub2Win interface. Select “Chrome OS” and it will hold some time to set up everything.

8. Now you are ready to set up your Google account and take delight Chrome OS along with Windows 10.

8. Troubleshoot
If you get the error “Not enough space to create image file”, “failed-to-get-canonical-path-of-cow” or “GtkDialog mapped without a transient parent” then follow the partition below. This will reduce your problems. It works but it is not a definitive solution. I will let you know if there is any other solution in the future.

Sometimes the user has difficulty in bootups in the beginning. This also happens when Windows overriding other EFI interfaces. For a quick fix, you can press the boot key (F7, F8, F9, etc.) during the startup.
If you encounter any problems related to it, be sure to comment below. We will do our best to help you.

